
A Complete Guide to LoL Wards and Warding in League of Legends
Warding in League of Legends is incredibly important. Teams with a higher vision score and better vision control than their opponents consistently win more games. It is vital that all players, not just the support, learn where to ward, when to ward, and how best to limit the opposing team’s vision.
This will be an in-depth guide about how to get better at warding in League of Legends. We will cover all aspects of warding and provide you everything you need to know to ensure good vision control for your team. This guide will be very useful to new League players, but it should also give some valuable tips to veterans as well.
1. What are Wards in LoL?
We’re going to start with some basics for new players. If you’re a Rift veteran, skip ahead to the section of best warding locations. There’s some juicy information for seasoned players there.
In League of Legends, most of the map is covered in a fog of war that prevents you from spotting enemy champions as they roam about the map. You or one of your teammates’ champions must be within visual range to spot them, or your enemies must pass near one of your stationary wards.
There are a few different types of wards in League of Legends. At the start of the game, you can choose between two trinkets (Warding Totem and Oracle Lens). The first is a basic vision ward that lets you see within a moderate radius around the ward. When you place the ward, it turns invisible after a brief delay and will last for approximately 2 minutes.

Warding Totem

Oracle Lens

Farsight Alteration
Your warding totem trinket can hold up to two charges and will slowly refill itself over time. There are very few reasons to hold onto both charges for any prolonged period of time. If you have extra charges, use them to place wards. We’ll cover the best locations for these totem wards in the next section.
The other starting trinket you can take onto the Rift is the Oracle Lens. This trinket allows you to spot unseen units, traps, and wards within a reasonable distance of yourself as you move around. Once detected, you can attack and destroy these hidden wards and units. Most of the time you will want to take the Warding Totem in the early game, but the Oracle Lens can be handy too, especially in the mid-to-late game. In the early game, it’s usually best to place wards to avoid getting ganked, but in the mid-late game, it’s also just as important to deny your opponent vision by destroying their wards.
In addition to the starting vision trinkets, you can also pick up a Farsight Alteration after your reach level 9, which allows you to place a farsight ward a considerable distance away from yourself. This is useful to spot enemies lying in wait without having to put yourself in danger. The trade-off for this benefit is that the ward remains visible while deployed. Unless you are looking in a very particular location, these are often best placed in brush to obscure them from passing enemies.
Each of the support quest items will also transform into an improved item capable of deploying stealth wards, but the charges can only be replenished by visiting your fountain. You may only have three stealth wards placed at any given time. Placing another will remove your oldest ward immediately.
2. What is a Control Ward?
Control wards are the last major type of ward in LoL. Unlike the other ward types, control wards stay on the map and do not expire (though you are limited to only one active control ward on the map at any given time). In addition to providing vision, they expose stealthed wards and traps, such as Teemo’s shrooms and Nidalee’s traps. Additionally, control wards reveal Evelynn and other stealthed champs, but they cannot reveal champions with true stealth, such as Akali and Shaco. They are very powerful, but they are single use and must be purchased from the store.

Control wards are the last major type of ward in LoL. Unlike the other ward types, control wards stay on the map and do not expire (though you are limited to only one active control ward on the map at any given time). In addition to providing vision, they expose stealthed wards and traps, such as Teemo’s shrooms and Nidalee’s traps. Additionally, control wards reveal Evelynn and other stealthed champs, but they cannot reveal champions with true stealth, such as Akali and Shaco. They are very powerful, but they are single use and must be purchased from the store.
Many new players think that they are not worth the 75 gold and thus don’t pick them up. That’s the wrong way to think about it. If you can place your control wards well, you may spot an enemy out of position, and therefore can get an extra kill, or obscure your movements from your enemies and avoid being killed.
If you act on the vision cues and coordinate with your teammates to slay enemies and takedown objectives safely, control wards provide much more benefit than their cost, which is why all Pro players purchase them, regardless of position.
3. Best Warding Locations
In this section, we will present the best general warding locations during each of the game phases. These are good places in general to ward, but they do not necessarily cover all potential scenarios. Always try to outthink your opponents and place your wards where you think they are most likely to go next or where it will be most relevant to spot them in case they try to pursue a particular objective.
Where to Ward During the Laning Phase?
Warding during the first 1:30 of the game usually isn’t very beneficial. Often players are either waiting near lane or are positioned to help their jungle take down the first monster. If you would like to prevent the enemy team from invading, this can be better accomplished by positioning your champions correctly to cover all river entrances rather than by placing wards.
At 1:30, it can be beneficial to ward the river brush on either side. LoL wards placed in either location will usually catch eager junglers attempting to invade your jungle or gank you at level 2. Warding there is especially important against aggressive junglers, such as Twitch, Shaco, and Udyr. Additionally, these wards can catch the enemy jungler attempting to take down the scuttle crab when it spawns at 2 minutes.
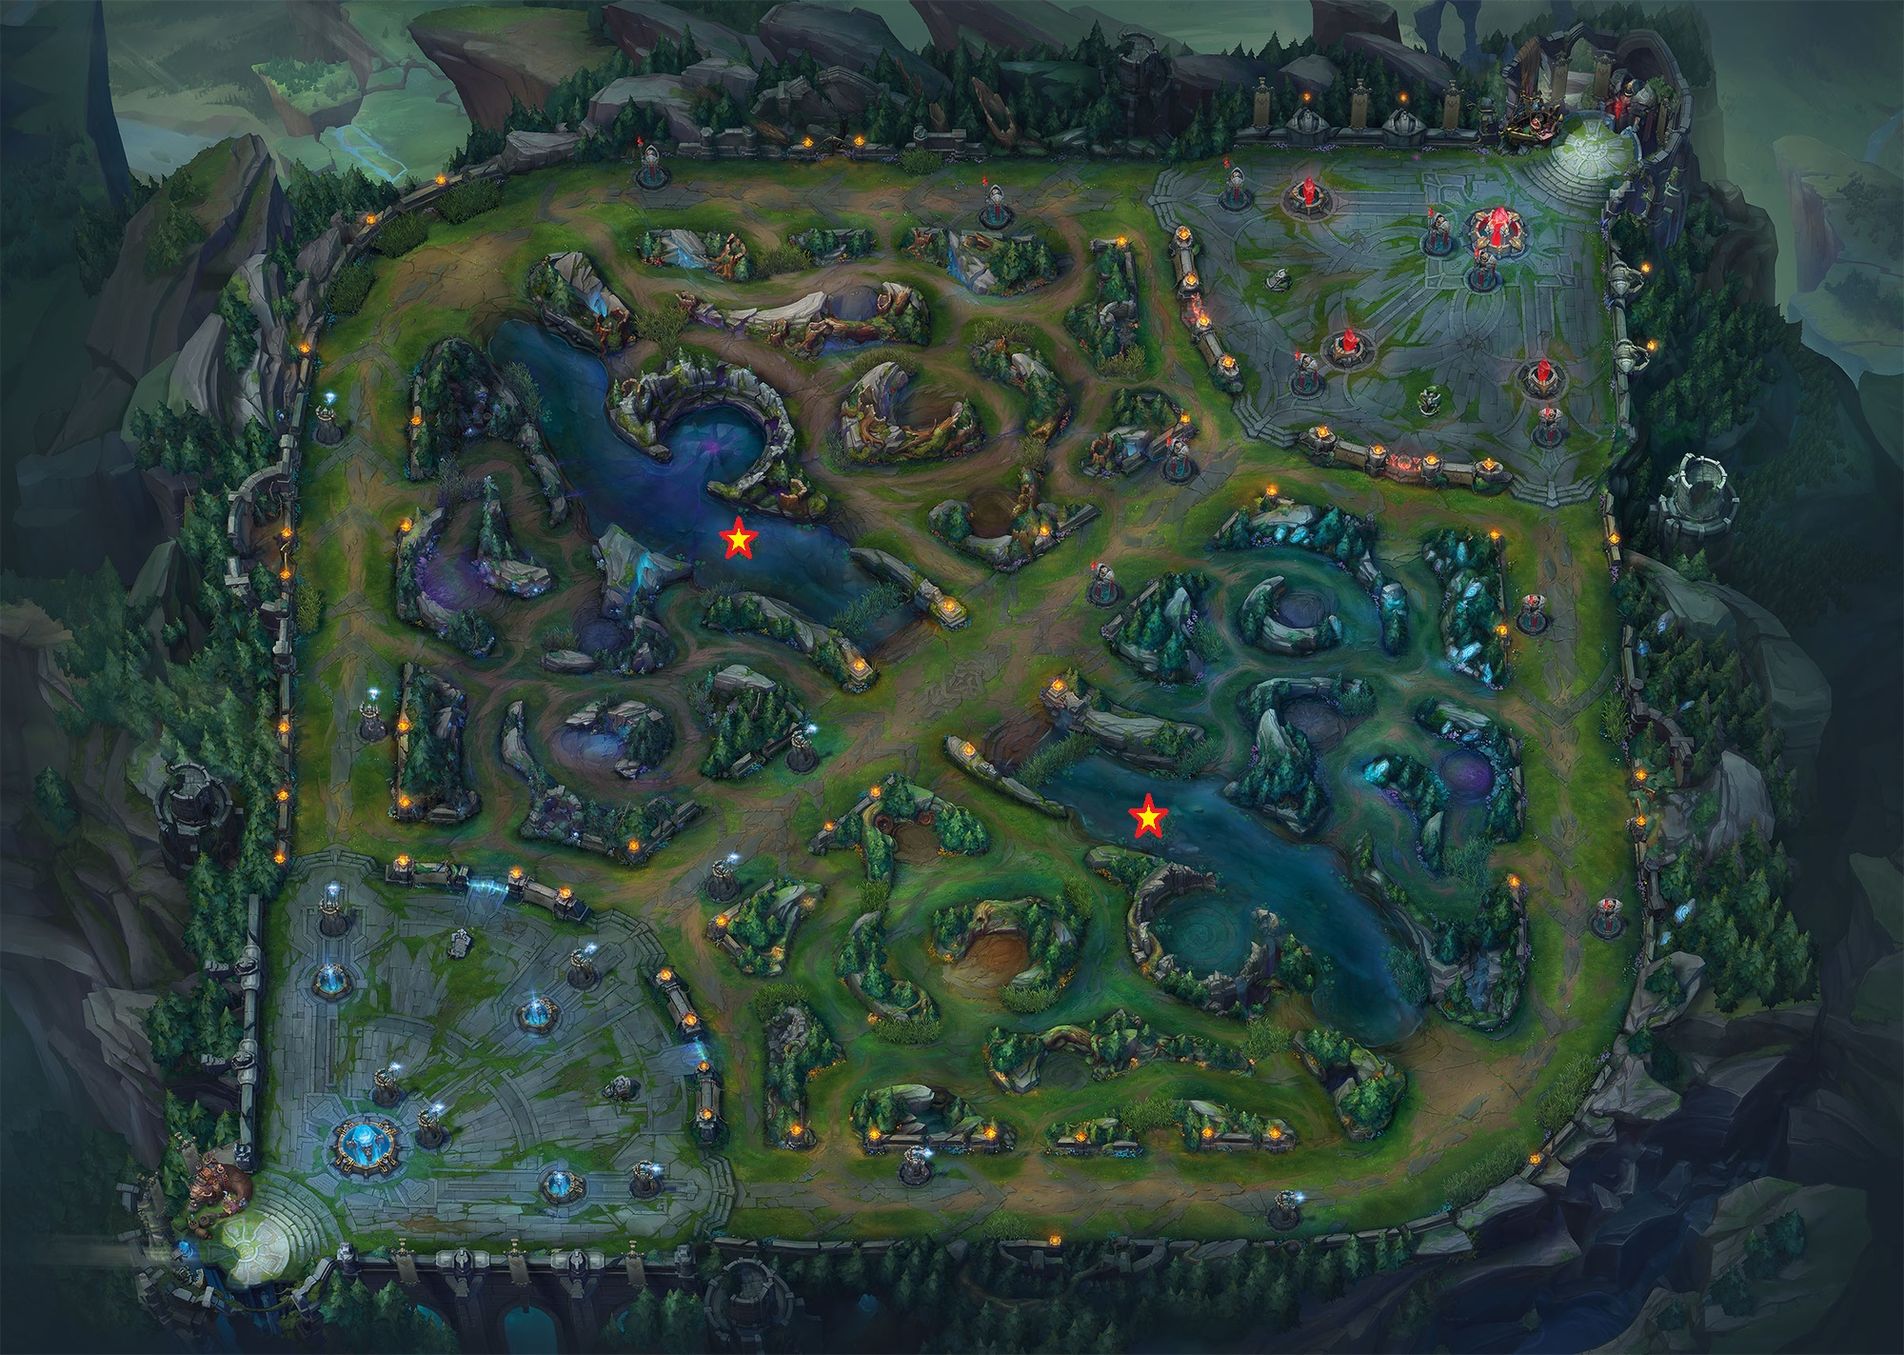
During the laning phase, try to think like the enemy jungler when deciding where to place your wards. You need to think about what jungle path they may take. Many junglers are juggling their own farming needs with their ganking responsibilities and want to get to your lane and gank as fast as possible. For this reason, most junglers gank through the shortest route possible. If you have pushed the minion wave and are exposed, it’s imperative that you ward the river brush nearest you in lane (red stars on the map).
You may even want to ward your own jungle or entrances to your own jungle if you think the enemy jungler may try to counter jungle and take your team's jungle spawns.
Some junglers may also try to gank you from behind, such as through the tri-brush in the bot lane when playing blue side. For that reason, keeping these secondary LoL ward spots (orange stars on the map) warded as often as possible is a good idea. Placing control wards in these locations can also be a great idea, as they are relatively far from lane, so you don’t want to go back every time a stealth ward times out.
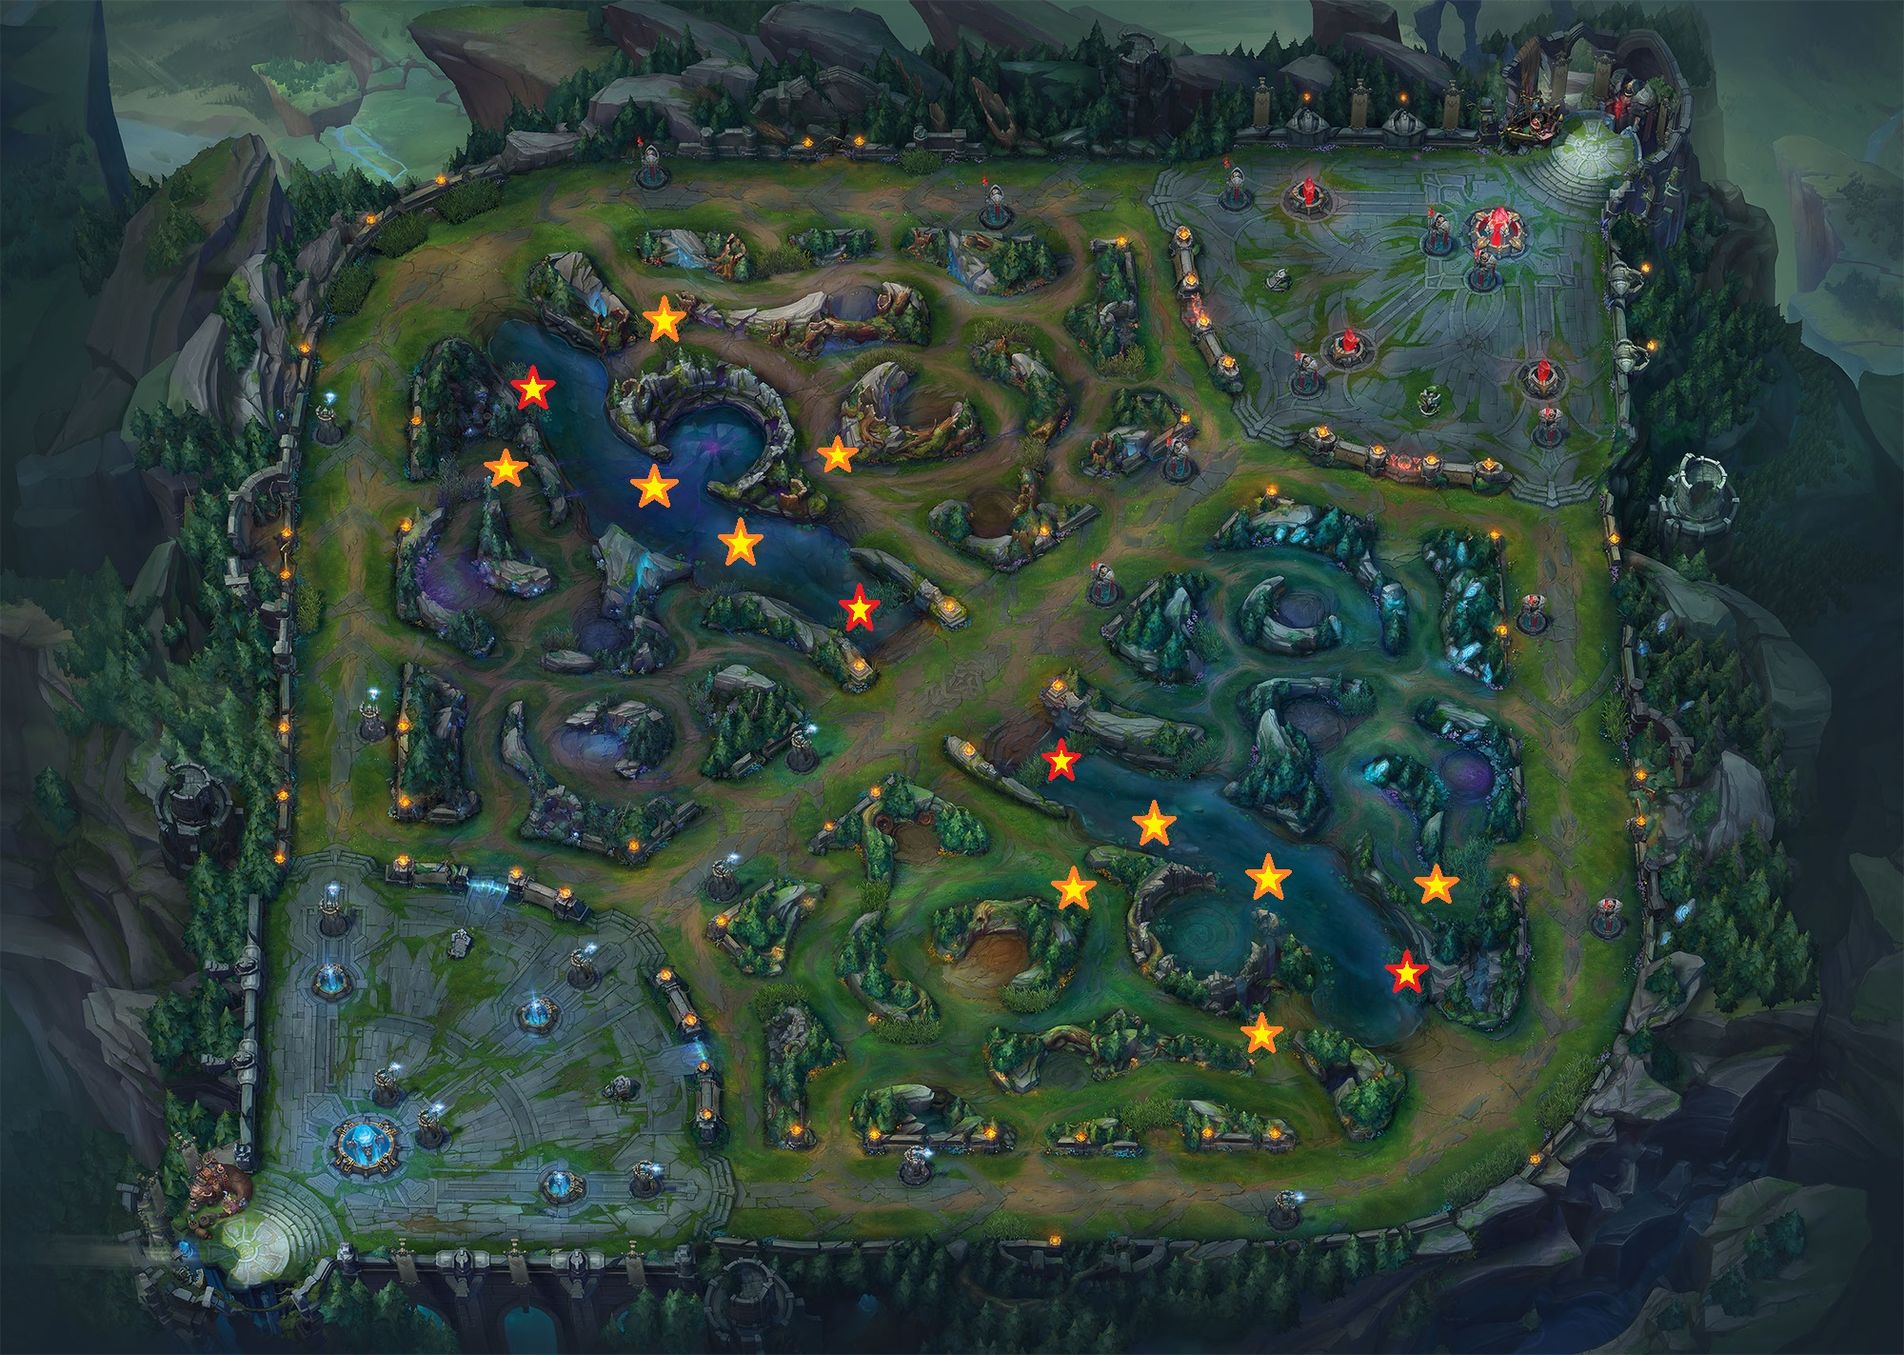
Though warding and counter warding is the responsibility of all teammates, it too often falls on the support at low ELOs to take care the team’s vision. Even when not warding, pay attention to the minimap. Map awareness in League of Legends is key to winning. If you are a new support in a low tier and are wondering: where to ward as support? The best you can do in lane is to keep the closest river brush warded 100% of the time. Beyond that, split your warding between the lane brush (if your opponents use them for cover), the tri-brush, and dragon (post 5:00).
Where to Ward During Mid / Late Game
After the laning phase ends, there aren’t many general, obvious warding locations to recommend. In this phase, you need to put yourself into the position of your enemies and to try to outsmart them. After the laning phase, your enemies will be trying to take objectives, dragons/barons, obtain CS, and pick off lone champions. If you have a first-tier lane tower that is still up, likely your opponents will try to take it down to reduce the area of the map you can more easily control. Try to place wards on paths they may take to get to that tower. Additionally, when the dragon is about to spawn, make sure it is warded.
In the late game where carries have become incredibly powerful and can take down the dragon very quickly, it is essential that you place wards on the path to the dragon rather than in the dragon pit itself, as it may take too long to respond if you only ward the dragon pit itself. When taking down the baron, ward around the outside of the pit, as your enemies will almost always try to contest or steal it at the last minute. Control wards can be especially useful when taking down barons and dragons, as they can deny the enemy team vision and prevent them from hoping over the wall and stealing it in the last moment.
When farming for gold during this phase of the game, don’t overextend yourself. Place stealth wards along clear ganking routes as you take out the minions. If you don’t, you will be feeding your enemies more gold than you earned in the attempt. These wards are also useful to spot flanking opponents, such as Kha’Zix, who will try sneak into your back line to eliminate your carries.
4. LoL Vision Score
Riot has devised a clever metric that measures your overall warding skill each game. It is increased both when you ward and when you deny vision. There are a few modifiers and extra details, which you can read about in this post by Riot, but the gist is your LoL vision score roughly equals 1 point per minute of ward lifetime you are responsible for providing your team or denying your enemy.
You may be wondering what is a good ward score, but it’s best not to focus on a specific vision score each game. Instead, you will find that you do better and win more often if you ward and sweep for wards consistently throughout the game whenever opportunities arise.
5. Warding Tips and Tricks
- You can ward over walls and other obstacles. The rule is that if you can place the ward more than halfway into the barrier, it will appear on the other side.
- Use where your enemy is warding to interpret what they plan to do next. For instance, if they are warding around the dragon pit, they likely intend to take it when it spawns.
- Warding inside brush is often best, as it prevents your vision from being obscured. However, most players know this and will sweep for wards in the most obvious bush spots. Sometimes unexpected ward placements can stay alive the longest and yield the best results.
- You can deny your enemy a ward kill by placing another ward if you have already maxed your number of placed LoL wards.
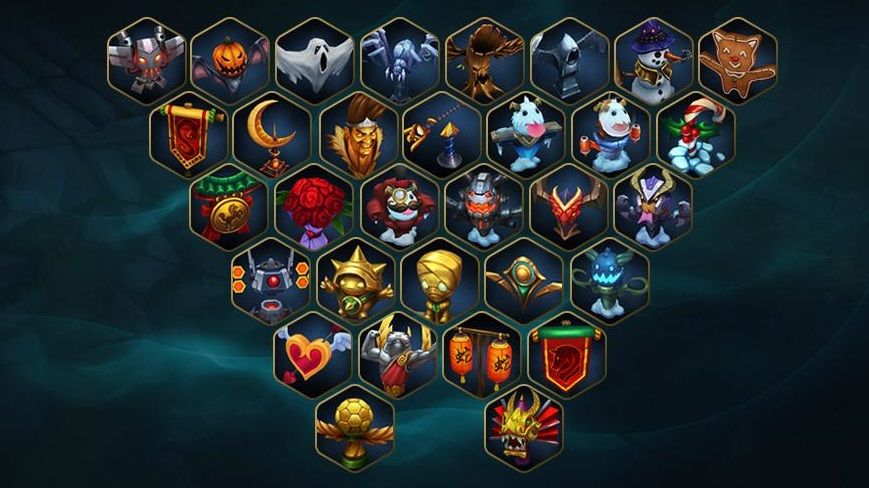
- You can change your ward skin during champion select if you have acquired a new ward skin.
- If you have two available charges on your warding trinket, use them. You are wasting them otherwise.
We hope you now know how to ward in League of Legends. Practice makes perfect. Please take what you have learned from this guide and put it into practice. When in doubt, try to put yourself in your opponent’s shoes. Do they want to gank you, and if so, from where? Do they want objectives, and if so, how will they get to them? If you are a new player, you may also want to check out our article on the best champions for new players in each position.
In the end, a lot of what will work will come from experiment and trying. The key to how to get better at warding in League of Legends is trying to out think your opponents while always getting your wards out there.
Have fun, and see you on the Rift!
Images Courtesy of Riot Games.